Over the years, I usually just install all of my dev tools on my local machine. While this typically works well, I've ran into a few issues recently that has caused me to look at other options. Mainly, my computer has crashed a couple times and I wanted more portability across my other devices like another machine or iPad. I think I may have found what I think is the ultimate dev setup. Shoutout to @pahudnet for the inspiration!
TLDR - I landed on Github + Actions + Codespaces. I'm going to start each project in a new repo which will pull a container with all of my dev tools into Codespaces. From there I can automate the test, build, and deployment with Actions.
I will be live streaming through this Dev Setup on YouTube and Twitch. Please follow and subscribe.
Github
Github is a code hosting platform for version control and collaboration. It lets you and others work together on projects from anywhere. Since Github was acquired by Microsoft, I have been really impressed with the additions. They have expanded features of the platform to include much more than just hosting your code. However, it all starts with creating a repository and then we'll dive into the other features later.
The first thing I did was create a repository that I can use as a way to build and push a docker container with all of my dev tools as well as a template for new projects going forward. So, I created a repo called codespace-devtools. There's a couple things I needed to add to the repo including making it a template repository and setting the secrets.
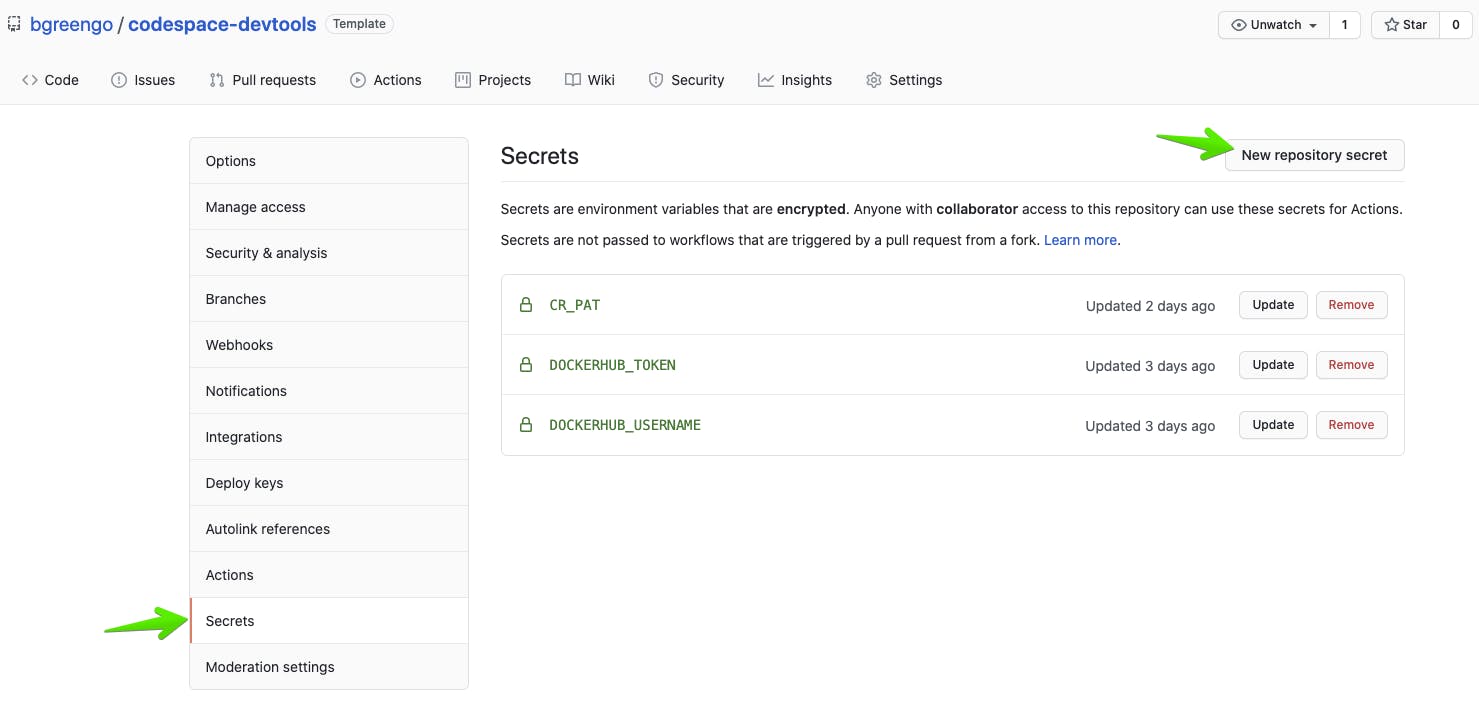
Just head to the Settings tab and enable Template repository.

Next, click Secrets on the left side and then add new repository secrets with key/values for your Github personal access token and Dockerhub credentials to push the devtools container to Github container registry and Dockerhub.

Github Actions
One of the those awesome new features to the platform is Github Actions, which makes it easy to automate software workflows with CI/CD. Now you can build, test, and deploy code all within Github.
I added a Dockerfile to the root directory to include all of my tools that I would want in my dev environment.
FROM linuxbrew/linuxbrew

RUN sudo apt-get upgrade -y
RUN sudo apt-get update -y
RUN sudo apt-get install jq -y

RUN sh -c "$(curl -fsSL https://raw.githubusercontent.com/Linuxbrew/install/master/install.sh)"

#brew install tools
RUN brew install starship
RUN brew install yarn
RUN brew install aws-cdk
RUN brew install docker
RUN brew install awscli
RUN brew install pulumi
RUN brew install terraform
RUN brew install node
RUN brew install cdk8s
RUN brew install ruby

# install terraspace
RUN gem install terraspace

ADD refresh_creds.sh /
NOTE: I added a refresh_creds.sh script, which can be found in my repo, to help get temporary credentials with AWS SSO.
Next, all you have to do is create a folder in the root directory so Github Actions will build and publish the container to Github container registry and Dockerhub. I decided to schedule the build and push once a week so that each dev environment stays up-to-date.
.github/workflows/docker-image-publish.yml
name: Publish Docker image
on:
  schedule:
    # At 00:00 on Sunday.
    - cron: 0 0 * * 0
  workflow_dispatch: {}

jobs:
  docker_hub:
    name: Docker Hub
    runs-on: ubuntu-latest
    steps:
      - name: Get short SHA
        id: sha
        run: echo "::set-output name=sha8::$(echo ${GITHUB_SHA} | cut -c1-8)"
      -
        name: Checkout
        uses: actions/checkout@v2
      -
        name: Set up QEMU
        uses: docker/setup-qemu-action@v1
      -
        name: Set up Docker Buildx
        uses: docker/setup-buildx-action@v1
      -
        name: Login to DockerHub
        uses: docker/login-action@v1
        with:
          username: ${{ secrets.DOCKERHUB_USERNAME }}
          password: ${{ secrets.DOCKERHUB_TOKEN }}
      -
        name: Build and push
        id: docker_build
        uses: docker/build-push-action@v2
        with:
          push: true
          tags: |
            ${{github.repository}}:latest
            ${{github.repository}}:${{ steps.sha.outputs.sha8 }}
      -
        name: Image digest
        run: echo ${{ steps.docker_build.outputs.digest }}

  github_container:
    name: Github Container Registry
    runs-on: ubuntu-latest
    steps:
      - name: Get short SHA
        id: sha
        run: echo "::set-output name=sha8::$(echo ${GITHUB_SHA} | cut -c1-8)"
      -
        name: Checkout
        uses: actions/checkout@v2
      -
        name: Set up QEMU
        uses: docker/setup-qemu-action@v1
      -
        name: Set up Docker Buildx
        uses: docker/setup-buildx-action@v1
      -
        name: Login to GitHub Container Registry
        uses: docker/login-action@v1
        with:
          registry: ghcr.io
          username: ${{ github.repository_owner }}
          password: ${{ secrets.CR_PAT }}
      -
        name: Build and push
        id: docker_build
        uses: docker/build-push-action@v2
        with:
          push: true
          tags: |
            ghcr.io/${{github.repository}}:latest
            ghcr.io/${{github.repository}}:${{ steps.sha.outputs.sha8 }}
      -
        name: Image digest
        run: echo ${{ steps.docker_build.outputs.digest }}
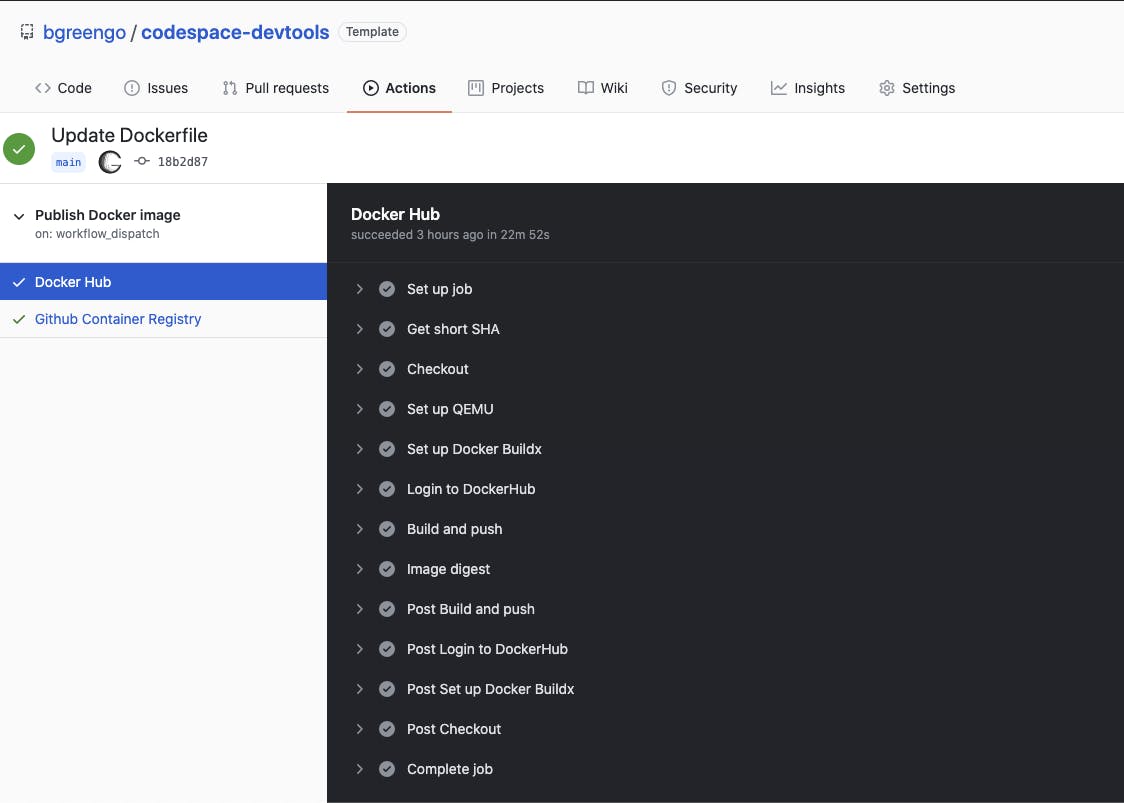
You can also run the jobs manually by going to the Actions tab and look at the workflows.

Github Codespaces
Another great addition to the platform is Codespaces. While it's still in beta, you can request early access. It's free for now but once it goes generally available, there will be some cost associated with it. I am a huge fan of VS Code and Codespaces is basically like having VS Code in your browser. The best part is that you can just click in your repo and it will spin up within minutes.
In order to use the custom container that I built with Github Actions, I added .devcontainer.json to the root directory. It looks like this:
{
    "name": "Dev Container Definition",
    "image": "bgreengo/codespace-devtools:latest",
    "extensions": [
        "dbaeumer.vscode-eslint@2.1.5"
    ]
}
New Project
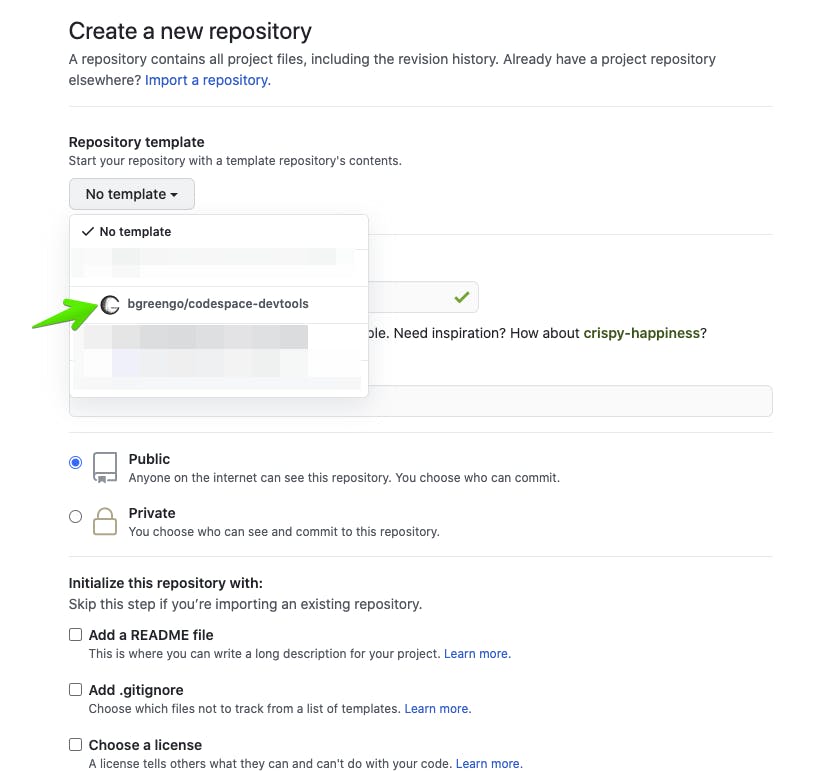
Now, when I create a new project, there's a template dropdown which includes my Codespaces dev tools. So when I open a new Codespaces instance, it will automatically start with all the dev tools that I included in the Dockerfile which is built/updated every week.

Honorable Mention
If the Github suite isn't your jam, I would also like to point out AWS Cloud9, which is a similar service to Codespaces. It's a cloud-based IDE that also allows you to quickly spin up a dev environment in your browser. One particular advantage of Cloud9 is the deep integration with other AWS services. So if you're developing with mostly AWS services, it might be in your best interest to go that route.
Conclusion
So far I am enjoying the consistency of being able to pick up any device, log into my Github account, and then have all of my dev tools ready to go. It allows me to jump in and start working. Even when it starts to cost money, I think I will continue to use this workflow. Rather than buying a big beefy computer to run all of my local development, all I need is a browser and an internet connection. This is the ultimate dev setup... in my opinion.
